Tesla Charger installation at Home: A Step-by-Step Guide
Table of Contents
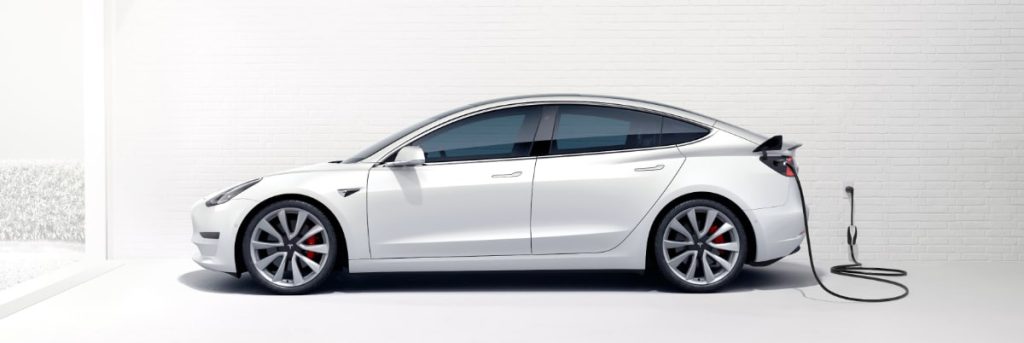
ToggleAs electric vehicles become increasingly popular, many Tesla owners are opting to install a Tesla charger at home for convenient and efficient charging. In this article, we will provide a comprehensive guide on how to install a Tesla charger at home, ensuring a seamless charging experience for your electric vehicle.
Why Choose a Tesla Charger?
When it comes to charging your Tesla at home, opting for a Tesla charger offers several advantages over traditional charging methods. Tesla chargers are specifically designed to deliver optimal performance and safety for your vehicle. Here are a few reasons why choosing a Tesla charger is a wise decision:
1. Faster Charging:
Tesla chargers provide faster charging speeds compared to standard outlets or generic charging stations, significantly reducing the charging time for your Tesla vehicle.
2. Convenience:
With a Tesla charger at home, you no longer need to rely solely on public charging stations, allowing you to charge your vehicle conveniently and at your own convenience.
3. Smart Features:
Tesla chargers come equipped with advanced features such as Wi-Fi connectivity, charging scheduling, and real-time monitoring, providing you with a seamless charging experience.
4. Compatibility:
Tesla chargers are specifically designed to work flawlessly with Tesla vehicles, ensuring optimal compatibility and performance.
5. Safety:
Tesla chargers prioritize safety, featuring built-in safety mechanisms such as overcurrent protection, ground fault detection, and thermal monitoring to safeguard both your vehicle and the charging infrastructure.
Understanding Tesla Charger installation
Before diving into the installation process, it’s essential to understand the different types of Tesla chargers available. Tesla offers two primary charging options for residential use

1. Tesla Wall Connector:
The Tesla Wall Connector is a high-powered charger capable of delivering up to 48 amps of power to your Tesla vehicle. It provides faster charging times compared to a standard outlet and is an ideal choice for Tesla owners looking for efficient and convenient charging at home.
2. Mobile Connector:
The Mobile Connector is a versatile charging solution that comes standard with every Tesla vehicle. It allows you to plug your vehicle into various outlets, including standard 120-volt outlets and higher-powered 240-volt outlets with an adapter. While the Mobile Connector offers convenience, it typically provides slower charging speeds compared to the Tesla Wall Connector.
Home Charging Options
We recommend a Wall Connector as the most dynamic home charging solution. The third generation Tesla Wall Connector is designed for easy installation, providing plenty of room for landing wires with entry point options from the top, bottom, and rear. Installers can conveniently commission the Wall Connector and connect it to the customer’s Wi-Fi network using a smartphone.
The Wall Connector hosts a Wi-Fi network for easy configuration of breaker size, Wi-Fi connectivity, and power sharing. This feature enables automatic firmware updates, ensuring the Wall Connector stays up-to-date with the latest features and functionalities.
Moreover, the Quickstart Guide included in the Wall Connector Box contains essential information about the device, benefiting installers during and after commissioning.
For a step-by-step guide on how to install the Gen 3 Wall Connector, you can refer to the Gen 3 Wall Connector installation manual and the accompanying video. With the Tesla Wall Connector, homeowners can enjoy the most convenient and efficient charging experience for their Tesla electric vehicles, making it the ideal choice for home charging needs.
Preparing for Installation
Before proceeding with the installation of a Tesla charger at home, there are a few key steps you need to take to ensure a smooth and successful process:
1. Evaluate Your Electrical System:
It’s crucial to assess your home’s electrical system to determine its capacity to handle the additional load of a Tesla charger. Consult a licensed electrician to perform an electrical assessment and ensure your home’s electrical infrastructure can support the charger’s power requirements.
2. Check Local Regulations:
Familiarize yourself with local building codes and regulations regarding the installation of EV charging equipment. Certain jurisdictions may have specific requirements or permitting processes that need to be followed.
3. Select an Ideal Location:
Identify a suitable location for installing the Tesla charger. Consider factors such as proximity to your parking spot, accessibility to the electrical panel, and the availability of adequate ventilation.
4. Consider Cable Length
Determine the cable length required to connect the Tesla charger to your vehicle. Measure the distance between the installation location and the vehicle to ensure you have the appropriate cable length for the installation.
Learn more about Best all season tire for subaru outback
Choosing the Right Tesla Charger Model
Tesla offers different charger models to cater to varying needs and charging capabilities. The two main options for residential installation are the Tesla Wall Connector and the Mobile Connector. When choosing the right charger model, consider the following factors:
1. Charging Speed:
Assess your charging requirements and consider whether you need the faster charging speeds provided by the Tesla Wall Connector. If you have a longer daily commute or need to charge multiple vehicles, the Wall Connector might be the better choice for faster and more efficient charging.
2. Flexibility:
The Mobile Connector offers portability and versatility, allowing you to charge your Tesla from various outlets. If you frequently travel or need the flexibility to charge in different locations, the Mobile Connector can be a convenient option.
3. Installation Cost:
Take into account the installation cost associated with each charger model. The Mobile Connector typically requires less complex installation compared to the Wall Connector, which may involve additional electrical work.
4. Future Expansion:
Consider your future charging needs. If you anticipate getting additional electric vehicles or require higher charging capacities, the Wall Connector may be a more suitable long-term solution.
Understanding the Requirements for Installing a Tesla Charger
Before embarking on the installation process, it is crucial to understand the requirements for installing a Tesla charger at home. These requirements include electrical capacity, suitable wiring, and proper grounding to ensure safe and efficient charging.
Preparing for the Installation
To prepare for the installation, gather the necessary tools and materials required for the process. It is also essential to familiarize yourself with the installation manual provided by Tesla, which contains detailed instructions specific to your charger model.
Choosing the Right Location for the Charger
Selecting the appropriate location for your Tesla charger is essential for easy access and efficient charging. Consider factors such as proximity to the electrical panel, parking space availability, and protection from the elements when choosing the installation spot.
Installing the Tesla Charger: Step-by-Step Guide
Now, let’s dive into the step-by-step installation process:
1: Shut off the power
Ensure safety by turning off the power supply to the area where you’ll be working.
2: Mount the wall connector
Install the wall connector in the chosen location using the appropriate mounting hardware.
3: Connect the wiring
Follow the wiring instructions provided in the installation manual to connect the charger to the electrical panel.
4: Secure the wiring
Properly secure and protect the wiring to prevent any damage.
5: Connecting the Charger to the Electrical Panel
Properly connecting the Tesla charger to the electrical panel is crucial for safe and efficient charging. It involves identifying the appropriate circuit breaker, connecting the wiring to the panel, and ensuring proper grounding to avoid any electrical hazards.
6. Ensuring Safety and Compliance
During the installation process, it is essential to adhere to safety standards and local electrical codes. This includes using the correct wire gauge, installing appropriate circuit breakers, and performing grounding tests to ensure compliance with regulations.
7. Testing and Troubleshooting
After completing the installation, it is important to test the Tesla charger to ensure it is functioning correctly. Perform a test charge and monitor the charging process. Additionally, be prepared to troubleshoot any potential issues that may arise, such as connectivity problems or error messages on the charger.
Learn more about electric cars battery cost
8. Maintenance and Care for the Tesla Charger
To maintain the optimal performance of your Tesla charger, follow these maintenance tips:

- Periodic Inspections: Schedule periodic inspections of your Tesla charger by a qualified electrician. They will check for any signs of wear, perform necessary maintenance tasks, and ensure the charger is operating at its best.
- Keep the Charger Clean: Regularly clean the charger using a soft cloth or sponge and mild cleaning solution. Avoid using abrasive materials or harsh chemicals that may damage the charger’s surface.
- Check Cable Integrity: Inspect the charging cable for any signs of damage, such as cuts, frays, or exposed wires. If you notice any issues, contact a professional to repair or replace the cable promptly.
4. Software Updates: Keep your Tesla charger up to date with the latest software updates. These updates often include performance enhancements, bug fixes, and new features to improve your charging experience.
5. Monitor Energy Usage: Stay informed about your energy consumption during charging. Monitor your electricity bills and adjust charging settings as needed to optimize energy usage and minimize costs.
6. Address Issues Promptly: If you encounter any issues with your Tesla charger, such as connectivity problems or charging inconsistencies, reach out to Tesla customer support or consult a qualified electrician for assistance.
Conclusion
Installing a Tesla charger at home provides Tesla owners with the convenience and flexibility of charging their electric vehicles at their own residence. By following the step-by-step guide outlined in this article, you can ensure a safe and efficient installation process. Remember to comply with safety standards and local electrical codes to guarantee a seamless charging experience.
Here is a post about Audi electric SUV
FAQs (Frequently Asked Questions)
1. Can I install a Tesla charger myself, or do I need to hire a professional?
While it is possible to install a Tesla charger yourself, it is recommended to consult with a licensed electrician to ensure proper installation and adherence to electrical codes.
2. Is it necessary to have a dedicated circuit for the Tesla charger?
Yes, it is essential to have a dedicated circuit for the Tesla charger to ensure safe and efficient charging without overloading the electrical system.
3. Can I use an existing 240-volt outlet for the Tesla charger?
In some cases, an existing 240-volt outlet can be used for the Tesla charger installation. However, it is crucial to verify compatibility and consult with an electrician to ensure proper wiring and safety.
4. Are there any maintenance tasks I should perform regularly for the Tesla charger?
Regular visual inspections, cleaning of the charger, and keeping the firmware up to date are recommended maintenance tasks for the Tesla charger.
5. Can I use my existing electrical outlets for charging my Tesla? {#use-existing-outlets}
While it is possible to use existing outlets with an adapter for charging your Tesla, it is not the most efficient or practical solution. Standard outlets provide lower charging speeds compared to dedicated EV chargers like the Tesla Wall Connector, resulting in longer charging times.
6. Can I take my Tesla charger with me if I move?
Yes, you can take your Tesla charger with you if you move. Both the Tesla Wall Connector and Mobile Connector are designed to be portable. However, ensure that the new location has compatible electrical infrastructure and consult a professional electrician for proper installation.


